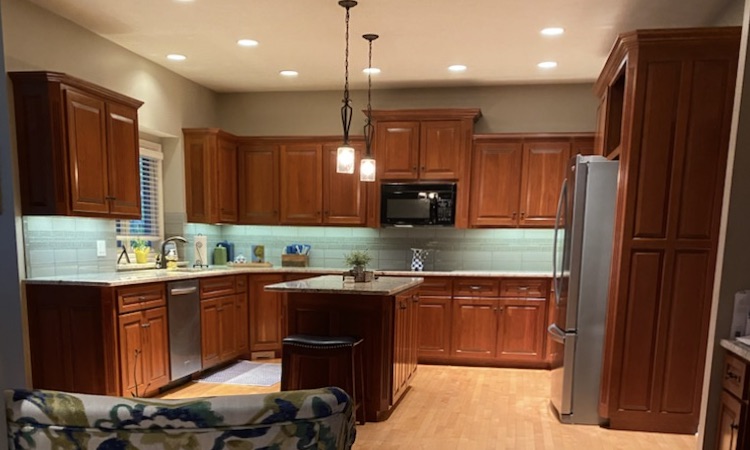
Are your oak cabinets in Omaha, NE looking a little dated and worn out? Given the area
they occupy, having worn out kitchen cabinets can significantly dent the
overall aesthetic appeal of your kitchen. Luckily, a fresh coat of stain can
restore your cabinets’ good looks and protect them from accelerated
deterioration.
The best way to have your precious oak kitchen cabinets stained is by hiring a
professional painting contractor. They have all the skills, experience, and
tools required to choose the suitable type of stain, prepare the cabinet
surfaces, and apply just the right consistency, and amount of stain.
At Brush & Roll Painting, we have over 25 years of experience staining oak cabinets. We have gathered tips and tricks and built on our skills over the years. To have your oak cabinets professionally stained by us in Omaha, NE, schedule an estimate.
However, if hiring a professional painting contractor is not an option for you, here are a
few DIY painting tips and considerations to keep in mind;
1. Choose the right stain
There’re mainly three types of wood stains based on the level of opacity; transparent
stains, semi-transparent stains, and solid stains. If your Oak kitchen cabinets
are still in good shape with no visible surface imperfections, a transparent
stain will allow the natural beauty of the wood to show through. However, if
you have older cabinets with visible surface imperfections, a solid stain can
help cover these up and offer superior surface protection.
Most professional painters and homeowners tend to favor semi-transparent stains
because they offer the best of both worlds. They allow the natural beauty of
the wood to show through while still providing a considerable level of surface
protection. If your cabinets previously had solid stain, you might find it
easier re-staining using solid stain.
2. Take down the doors and drawers
Before the actual work begins, you need to take down all the cabinet doors and drawers and
take off the hardware. Professionals do this all the time for a good reason
–attempting to stain the cabinets while still intact can create a messy stain
job. You will find it difficult to sufficiently clean and sand off the dirt and
previous finishes from obscured corners and edges. Besides, some of the stain
will end up on the hardware and other areas that you didn’t plan to stain,
leaving you with a less flattering finish.
3. Clean your cabinets
The stain doesn’t bond properly with the dirty, greasy surface. Any form of dirt or
surface impurity will prevent the stain from penetrating the grains of the wood
as it should. Use a de-glosser or de-greaser to clean greasy surfaces. You can
also use tri-sodium phosphate (TSP) for cleaning if the surface has stubborn
dirt. Rinse everything down with plenty of clean water to get rid of any
residual chemicals once finished.
4. Sanding is still important
Washing alone is not sufficient if you’re looking for a durable stain job. Sand the
cabinet boxes, doors, and frames using an orbital sander. Since you want to
preserve the value of your oak wood, don’t use sandpaper that is too coarse. A
150-grit sanding disc or sandpaper should be sufficient. Sanding the cabinet to
a smooth finish removes the remaining traces of the previous finish, allowing
for maximum stain penetration and a smooth finish.
The Bottom Line
This article is by no means a comprehensive guide on how to stain oak cabinets;
instead, think of it as a general overview of the essential steps to consider.
Use a paintbrush to apply two coats of your stain
of choice on a clean, dry surface during the actual staining. Remember to wait for the first coat of stain to dry before applying the second coat.
As earlier mentioned, you might need some level of staining experience to stain your own oak kitchen cabinets successfully. However, if you need professional help with kitchen cabinet staining in Omaha, NE, our Brush & Roll Painting team can help. To get started, book a FREE estimate below or call us today at 402-932-9764 for more details.
If you are not sold on staining your oak cabinets, check out the pros and cons of painting them instead.
To learn more about painting oak cabinets click here.
Bill is the owner and operator of Brush & Roll Painting.
Topics:
